We all have a drawer filled with old smartphones, a graveyard of tech gadgets. It’s filled with old charging cables, TWS cases, and at least one old Android phone that’s covered in dust. While it might be too slow for gaming or have a broken component, it also has potential you’ve overlooked.
But with a little tinkering, you can transform that sluggish old device into a new high-res digital audio player (DAP) that can rival expensive devices like the Sony Walkman or Astell & Kern.
In this guide, we’ll remove all the bloatware, background services, and battery drain from that old device to create a machine that focuses on one thing pure, bit-perfect audio.
Why do that?
You might be wondering, “Why can’t I just listen to music directly on my current phone?”
The Android operating system has a major problem. By default, Android processes all audio through a system mixer so that it can play your music, ringtones, and notification sounds all at the same time. In doing so, it often “downsamples” high-quality music files (such as 24-bit/96kHz FLACs) to the standard 48kHz.
To enjoy true “Hi-Res” audio, we need to bypass this limitation. Here’s a step-by-step roadmap.
Phase 1: Clean Your phone
By following this step, you can significantly improve battery life, privacy, and performance by removing pre-installed “junk” apps from your smartphone.
A step-by-step guide to complete this step is provided below.
You can ignore this step, but it can significantly increase the speed of your old phone.
Step 1: Preparation (Computer and Phone)
Before you download and use the tool, you need to prepare your environment so that the tool can actually communicate with your phone.
1. Install ADB (Android Debug Bridge)

The de-bloater relies entirely on ADB to send commands to your phone.
- Windows:
- Download the SDK Platform Tools from the official Android website.
- Extract the ZIP file to a folder you can easily access (e.g., C:\adb).
- macOS / Linux:
- You can install it via the terminal (e.g.,
brew install --cask android-platform-toolson Mac orsudo apt install adbon Linux).
- You can install it via the terminal (e.g.,
Or Download tools for all os Go to official Link.
2. Enable USB Debugging on your phone
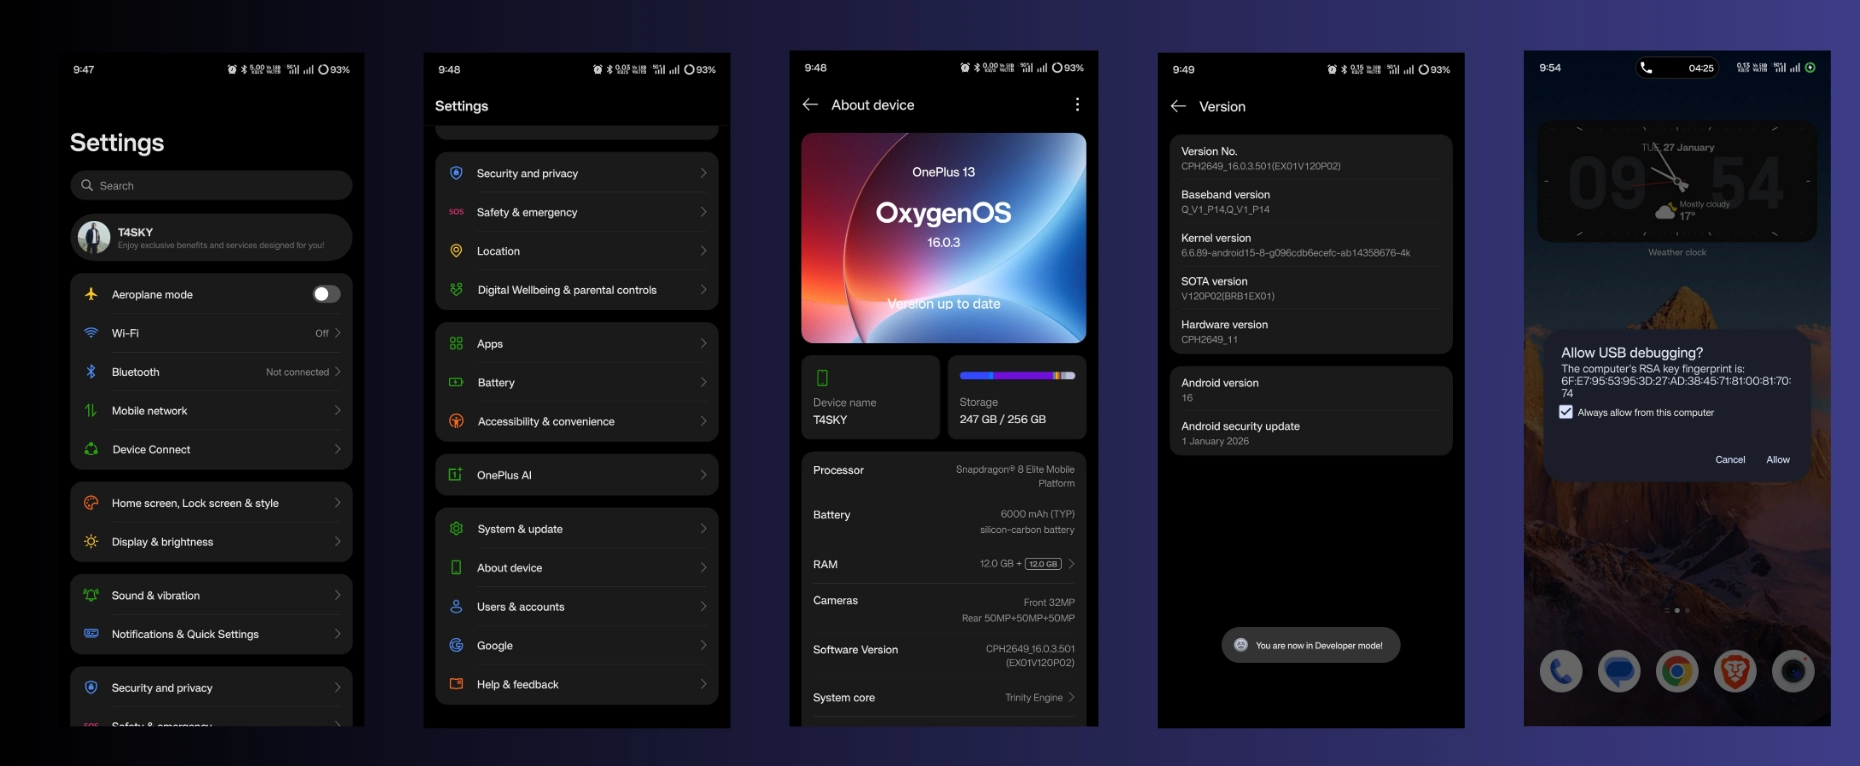
- Go to Phone Settings > About Phone.
- Find the Build Number and tap it 7 times quickly until you see the message: “You are now a developer!“
- Go back to the main Settings menu and find Developer Options (usually under “System” or “Additional Settings“).
- Scroll down and enable USB Debugging.
3. Install USB Drivers (Windows only)
If you are using Windows, you may need specific drivers for your phone (Samsung, Xiaomi, OnePlus, etc.) so that the computer can recognize it properly.
Tip: A quick Google search for “[phone brand] USB drivers” will usually help you find the drivers for your phone.
Phase 2: Installing the Debloater Tool
- Download the tool:
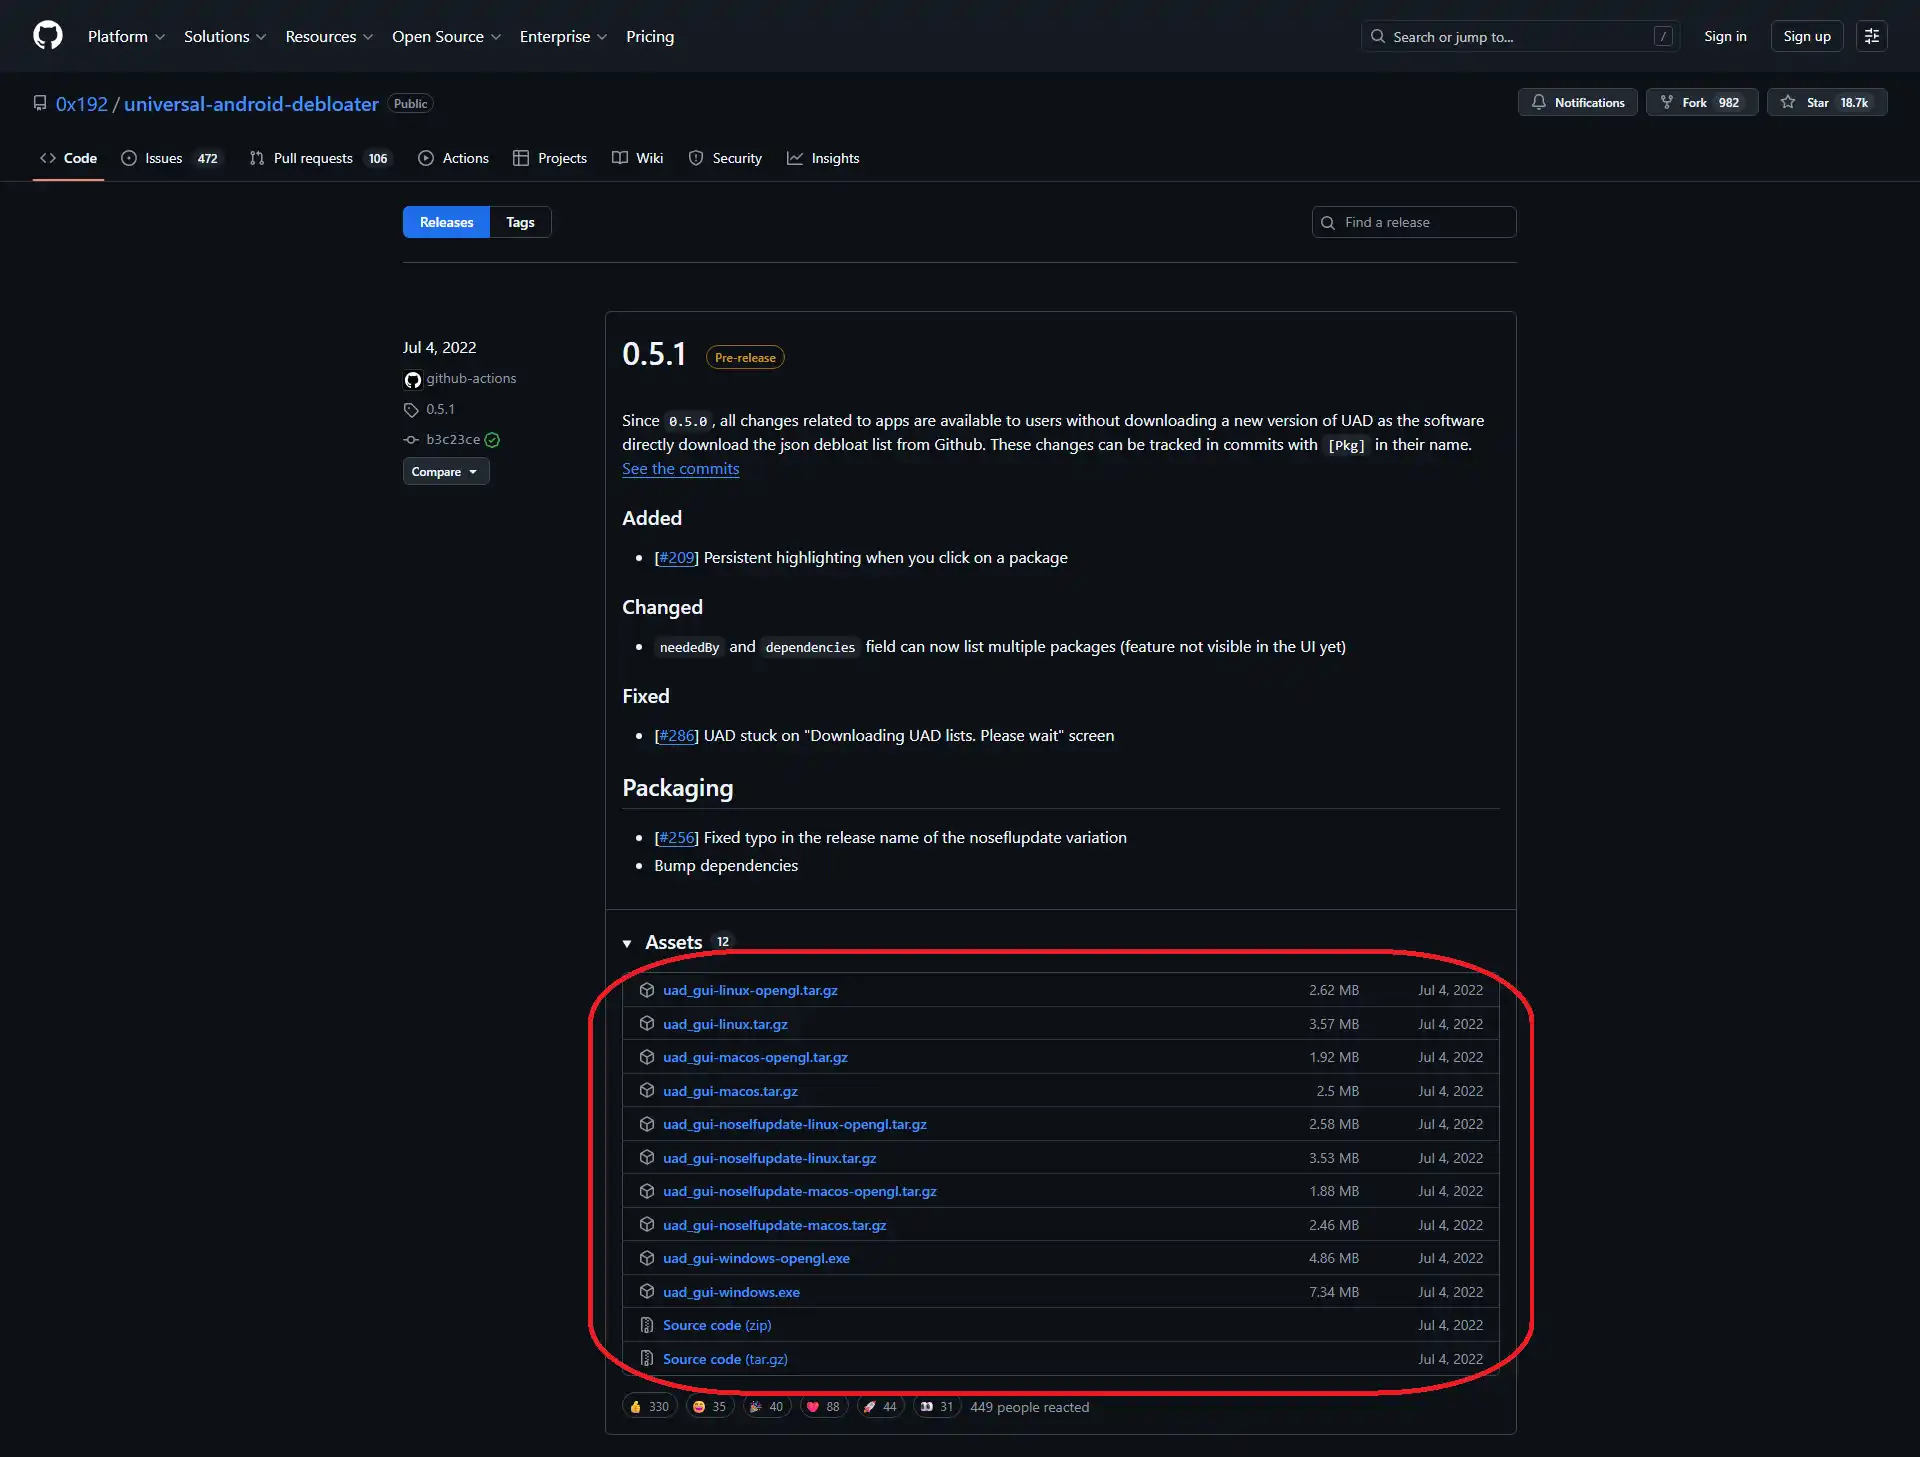
- Go to the repository’s releases page: https://github.com/0x192/universal-android-debloater/releases
- Look for the latest version (e.g., v0.5.x or newer).
- Click on Assets to expand the list.
- Windows users: Download uad_gui-windows.exe
- Mac users: Download uad_gui-macos
- Linux users: Download uad_gui-linux
- Place the file in the correct location:
Important step: Move the downloaded uad_gui file to the same folder where you extracted your ADB tools (the folder containing adb.exe).
Note: If you installed ADB globally (system-wide), you can run the file from anywhere, but placing it in the ADB folder prevents most “command not found” errors.
Phase 3: Connecting and Removing Bloatware
1. Connect your phone
- Connect your phone to your computer using a USB cable.
- Unlock your phone’s screen.
- A prompt will appear on your phone asking: “Allow USB debugging?”
- Check “Always allow from this computer” and tap Allow/OK.
2. Run the tool
- Double-click the uad_gui file on your computer.
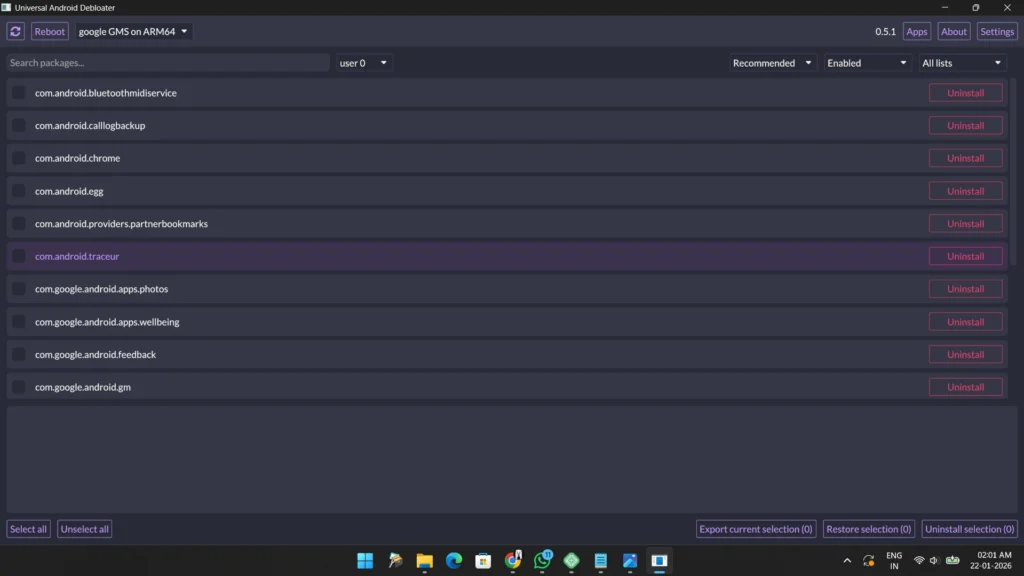
- The tool will launch and automatically detect your phone. You should see your phone’s model name (e.g., SM-G990B) in the top left corner.
- If it says “No device found,” click the refresh button (circular arrow) in the tool or check your USB cable.
3. Select and remove bloatware
- The interface is color-coded and categorized for your safety.
- Filter the list by (top menu):
- Recommended (Green): Safe to remove. These are the bloatware apps that won’t break your phone. Start here.
- Advanced (Orange): Safe to remove, but may remove functions you use (e.g., default email app, calculator).
- Expert/Unsafe (Red): Avoid these unless you know exactly what you’re doing. Removing these could cause your phone to get stuck in a boot loop.
4. How to remove bloatware:
- Click on the Recommended dropdown.
- You will see a list of apps installed on your phone.
- Check the box next to the apps you want to remove.
- Click the Uninstall Selection button in the bottom right.
Tip: Click on an app’s name to see what it does (e.g., “Facebook App Manager,” “Analytics,” etc.).
5. How to restore (if you made a mistake)
One of the best features of this tool is that it doesn’t permanently delete system files; it simply uninstalls them for the current user (you). This means you can easily restore them.
- In the UAD interface, look for the State filter dropdown.
- Change it from Installed to Uninstalled.
- Find the app you accidentally deleted.
- Check the box and click Restore Selection.
Phase 4: For Hi-Res Music
For Streaming: Apple Music
In these times of inflation, Apple Music is currently the best option for audiophiles because it offers lossless audio at no extra cost.
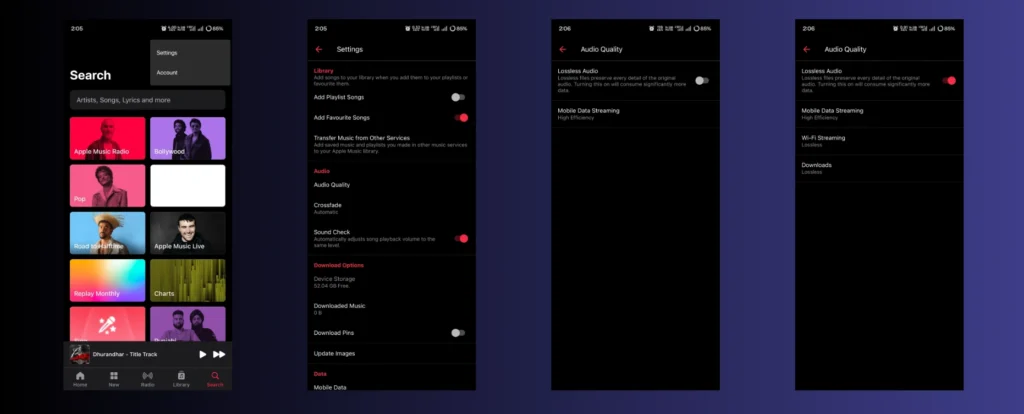
- Install Apple Music from the Play Store.
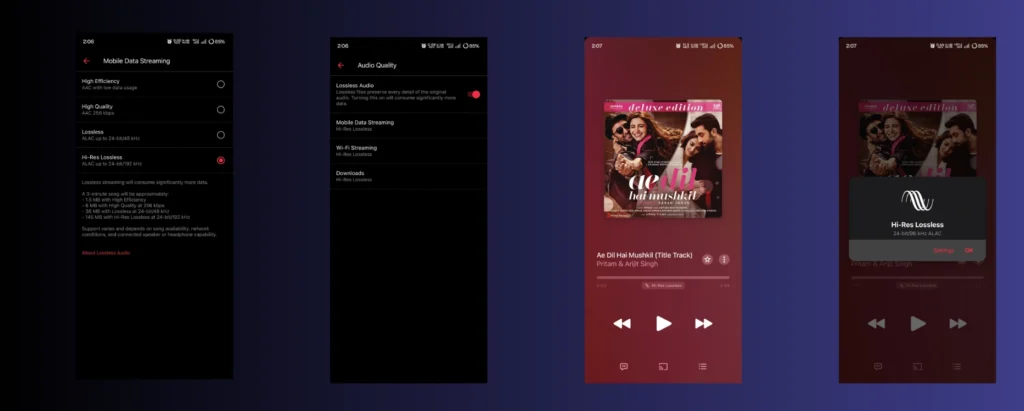
- Go to Settings > Audio Quality on the right side.
- Turn on Lossless Audio.
- Set CellularStreaming, Wi-Fi Streaming & Downloads to Hi-Res Lossless (up to ALAC 24-bit/192kHz).
Pro Tip: Download your playlists for offline listening and turn on Airplane Mode. This reduces electrical noise from the Wi-Fi/cellular radio.
For Local Files: Hiby Music
- If you have a library of FLAC or DSD files, Hiby Music is the king of free players.
- Install Hiby Music from the Play Store.
- Connect your USB DAC (more on this in Phase 5).
- Go to Settings and find “Exclusive HQ USB Audio Access.”
- Turn it ON.
- When prompted “Allow Hiby Music to access [USB device]?”, tap OK.
Why this is important: When “Exclusive Mode” is active, Hiby takes complete control of the hardware. You won’t hear any notifications, incoming calls, or any other phone sounds. The app forces the hardware to run at the sample rate of the music file (bit-perfect), completely bypassing Android.
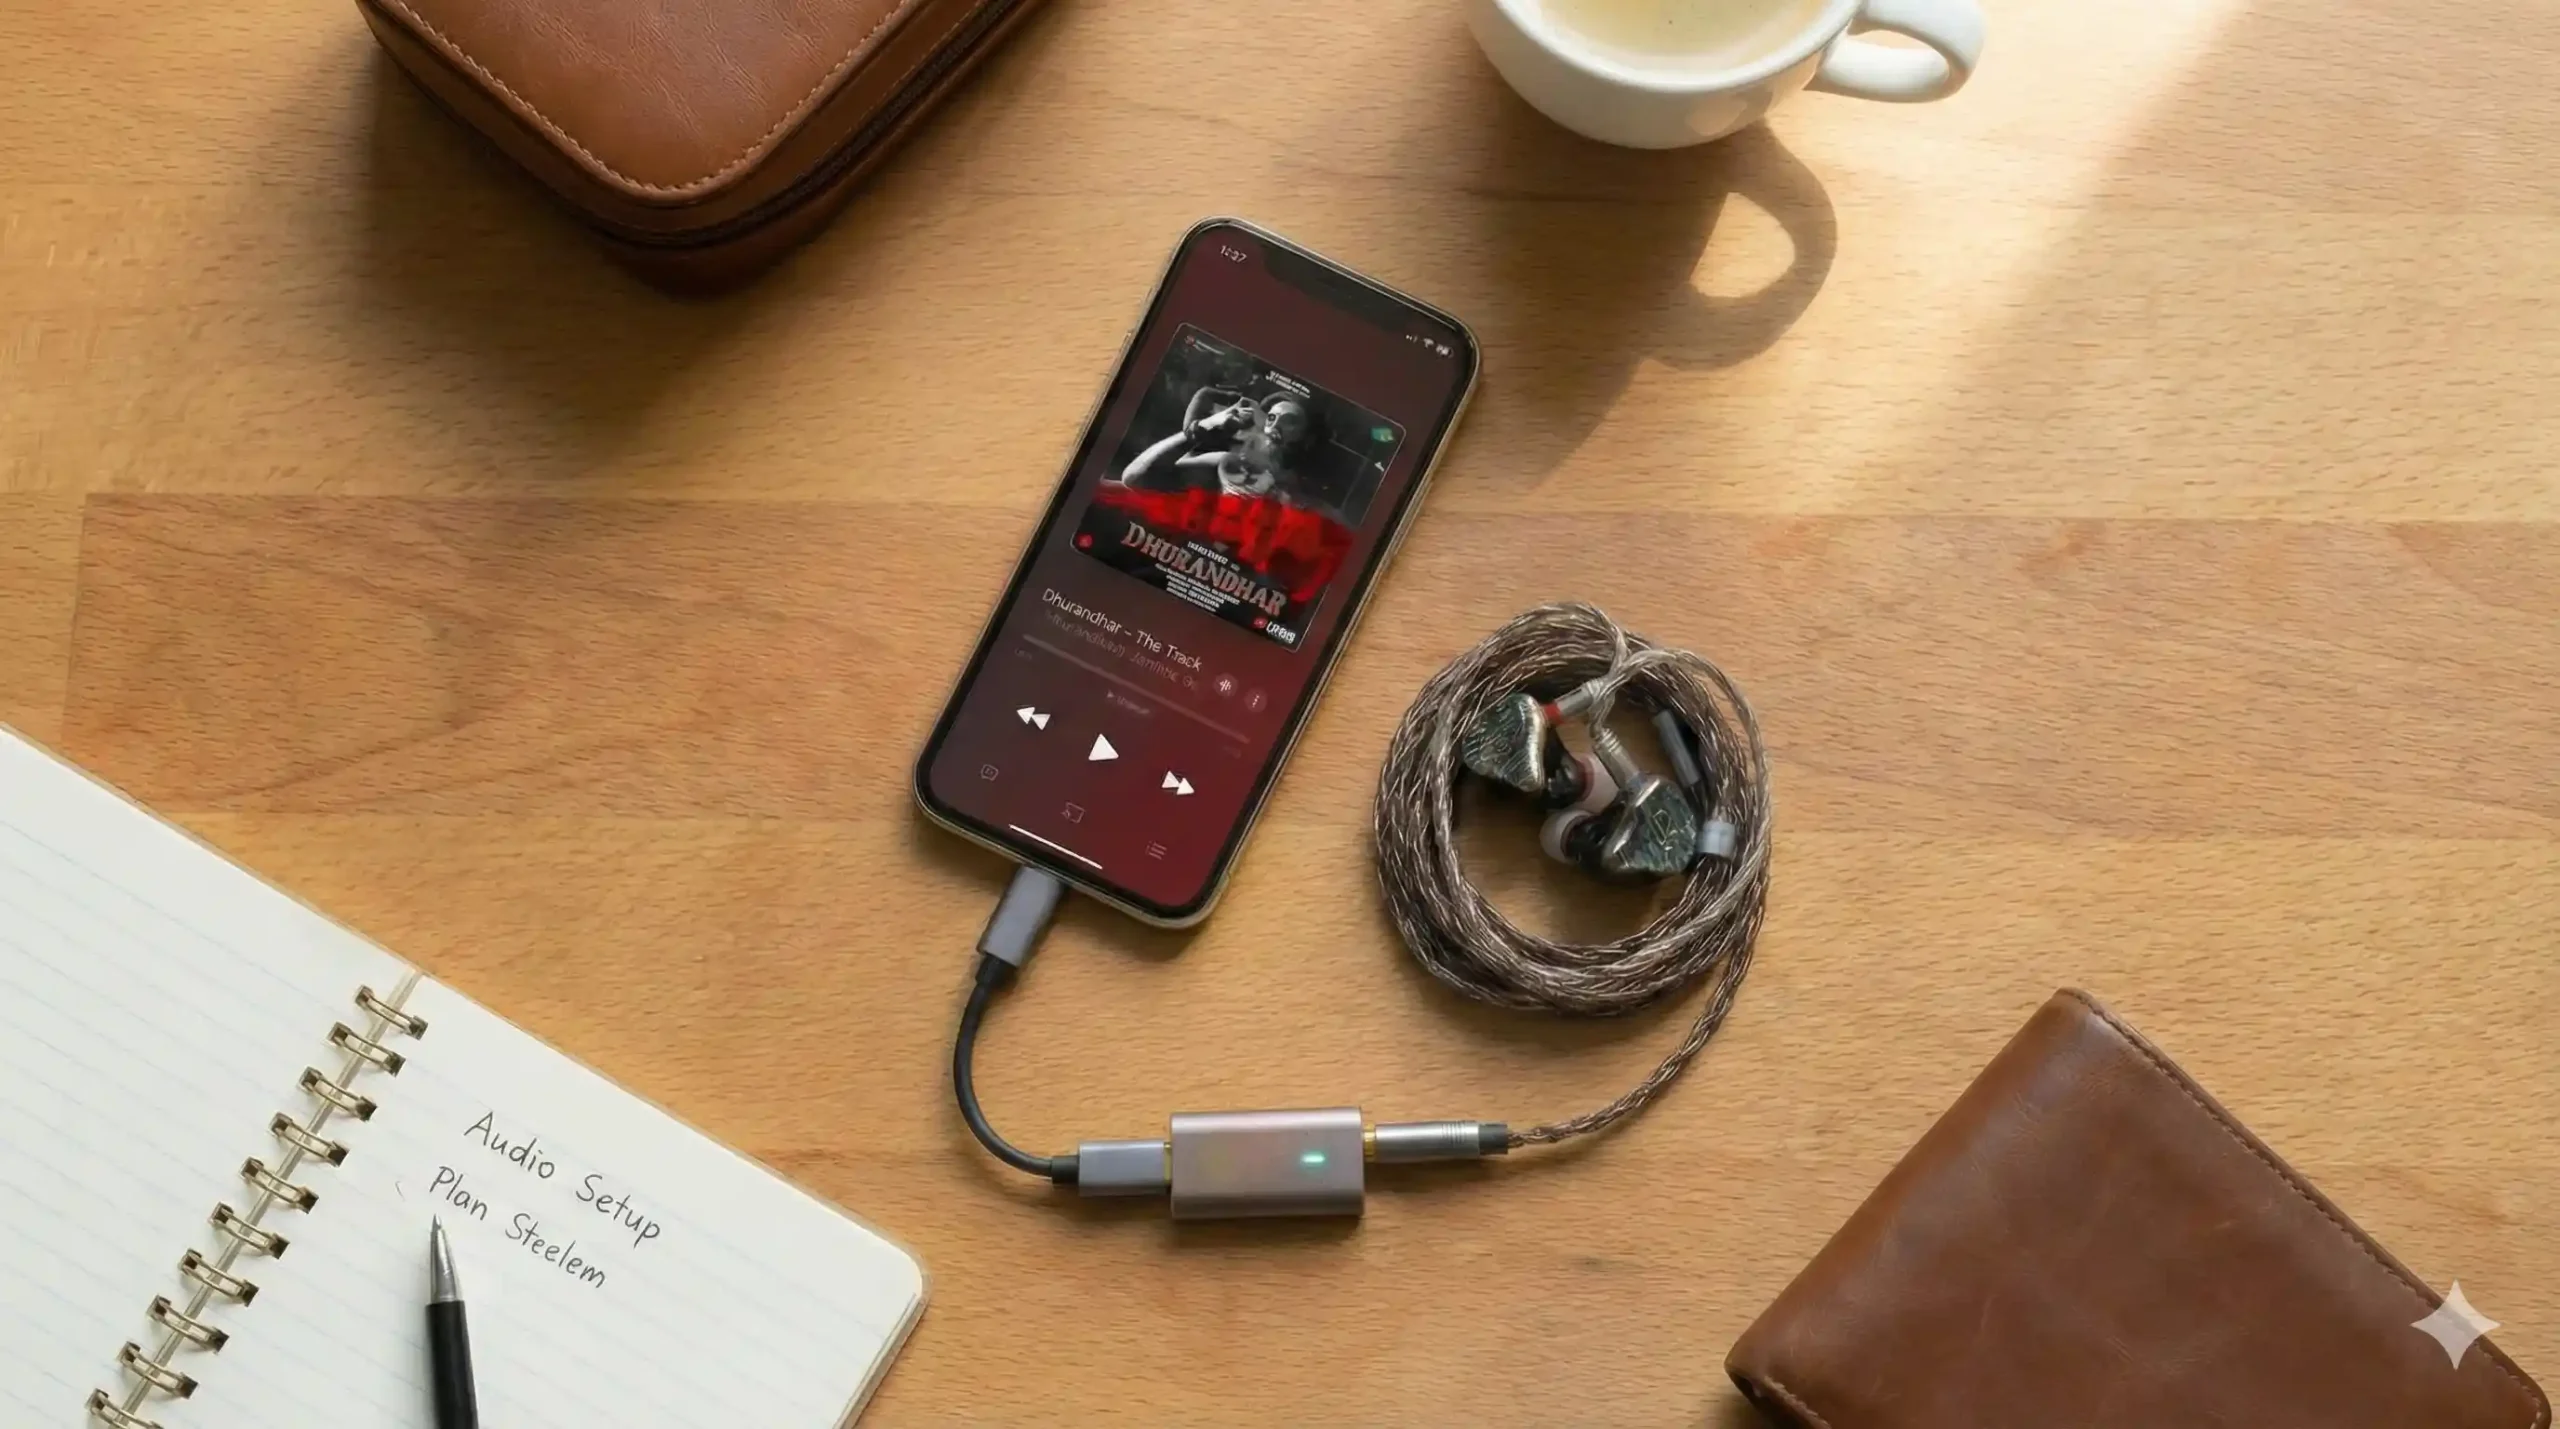
Phase 5: DACs & IEMs
Now that your smartphone’s software is all ready, you need the hardware for music. As mentioned, the built-in headphone jack (if your phone has one at all) often interferes with listening to music. Here’s a list of the best gear to get the best sound from your new DAP, categorized by budget.
DAC & Amplifier
A DAC is a chip that converts digital information into audio sound.
Your phones also come with a DAC, but it is not powerful enough to fully power in-ear monitors (IEMs) and utilize them to their full potential.
Entry-Level / Portable DAC (₹900 – ₹3,000)
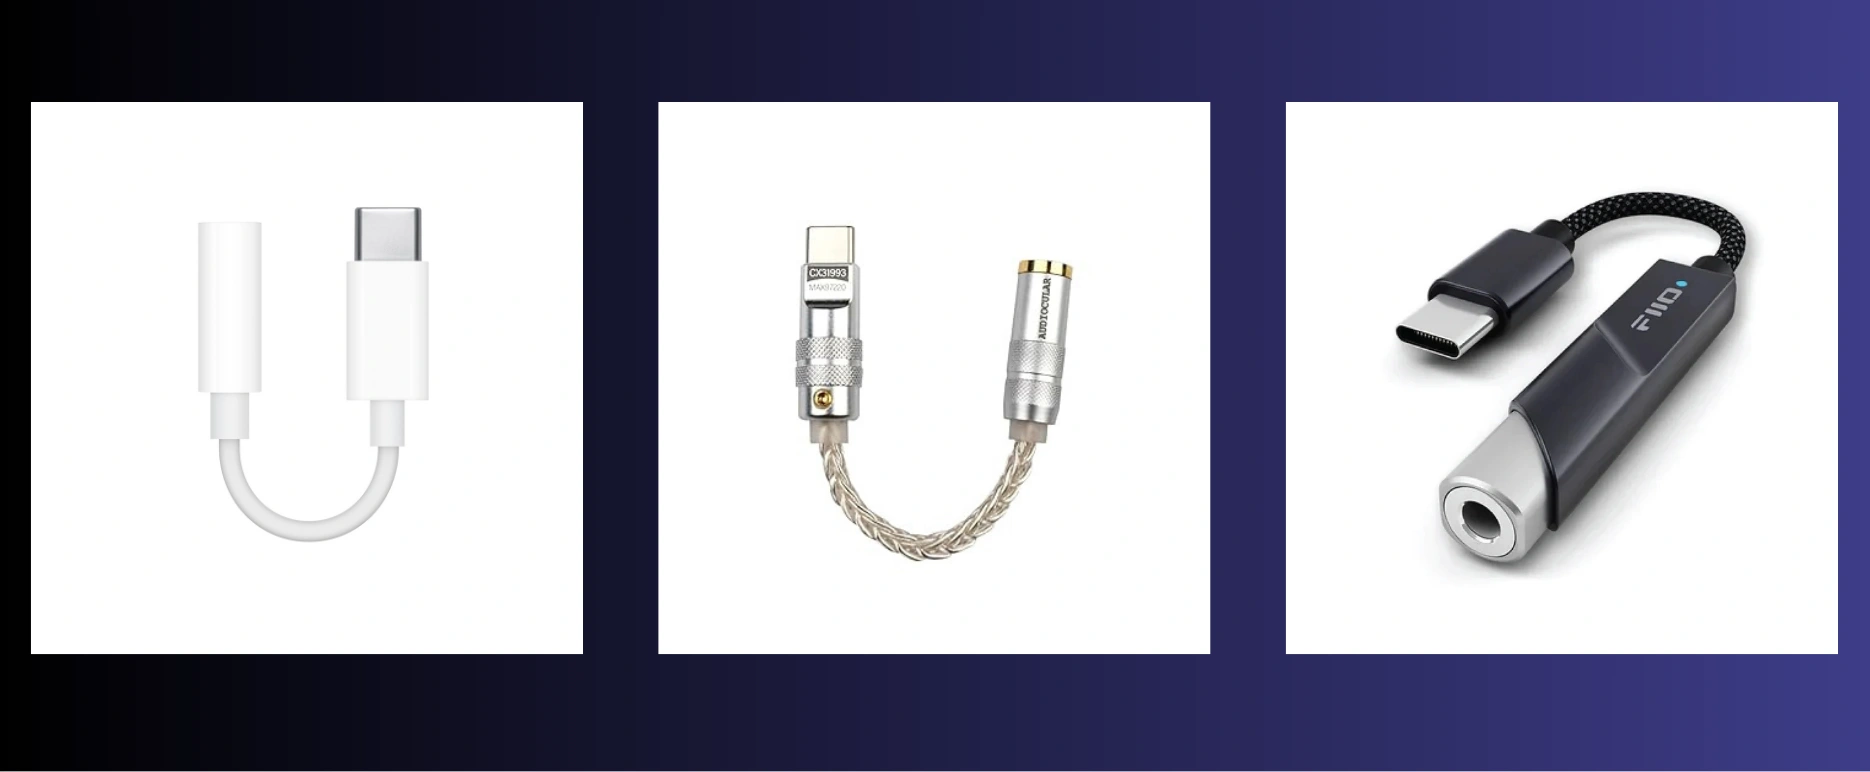
- Apple USB-C to 3.5mm Dongle (approx. ₹900): This is the cheapest and best option, working flawlessly and delivering clean, neutral sound. Perfect for sensitive IEMs. Easily available on Apple India or Amazon.
- Audiocular D07 (approx. ₹999): A fantastic budget option currently available in India. It boasts a more robust build and more powerful performance compared to the Apple dongle and works well with budget IEMs.
- Fiio KA11 (approx. ₹2,990): This is a small yet powerful dongle. If you need more volume and punchier bass than the Audiocular D07, this is the best upgrade under ₹3k.
IEMs [In-Ear Monitors]
The IEM market moves very fast. Currently, the trend is towards “Hybrid” drivers (mixing dynamic and balanced armature drivers) and excellent tuning even at the lowest price points.
Entry/Budget IEMs (₹1,500 – ₹7,000)
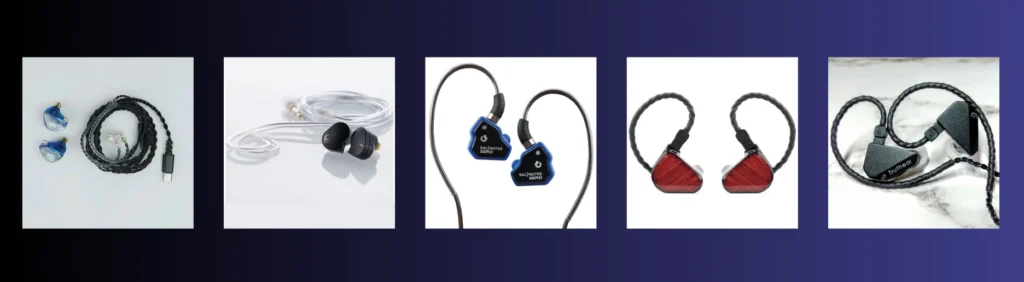
- Tangzu Wan’er S.G (approx. ₹1,699): This IEM is known for its beautiful looks and excellent, comfortable vocals. The sound quality far exceeds its price.
- Moondrop Chu II (approx. ₹1,890): Made with a metal shell, it delivers clear sound with a good bass boost.
- 7Hz Salnotes Zero 2 (approx. ₹1,999): A fun, slightly warmer upgrade to the original Zero. Great for Indian pop and hip-hop listeners.
- Truthear x Crinacle Zero: RED (approx. ₹4,999): Tuned to the “Harman Target,” making it a safe and excellent recommendation. It offers a fantastic sub-bass rumble without compromising the vocals, making it one of the best in this category.
- Truthear Hexa (approx. ₹6,990): The king of detail under ₹7k. It uses a hybrid setup (1 dynamic + 3 balanced armature drivers) to deliver crisp, analytical sound.
Final Thoughts
Congratulations! You’ve not only contributed to reducing e-waste in the world, but you’ve also transformed an old, dusty phone lying in your drawer into a high-resolution audio player (DAP).
Just think, the device you considered useless can now outperform 99% of modern smartphones and expensive flagship devices on the market in terms of audio quality. You’ve created a premium Digital Audio Player (DAP) experience at home without spending thousands of rupees.
But this project isn’t just about “great sound,” it’s also about “peace of mind.”
In today’s world, where our attention is constantly interrupted by notifications, calls, and social media, this device offers you a much-needed digital detox. By dedicating a device solely to music, you create a focused and peaceful environment.
Now, when you listen to music, no WhatsApp ping will disturb you, no office email will spoil your mood. This time is just for you just you and every subtle note of the music that the artist intended for you to hear.
So, put on your IEMs, shut out the noise of the world, and lose yourself in the music. Happy listening!
I know I couldn’t cover all the details in this post, but if you have any suggestions for things I should have added, please feel free to let me know in the comments.
Founder and Editor-in-Chief
Vaibhav isn’t just a tech writer he’s always been a technology enthusiast who believes hardware specs shouldn’t be treated like a second language.
His journey began with a curiosity about what goes on inside our favorite devices. From flashing custom ROMs on early Android devices to “distro-hopping” between different Linux environments, Vaibhav spent years experimenting with open-source software and mobile architecture before writing a single article.
He started writing tech news articles out of a personal frustration that many tech sites simply copy and paste specifications without explaining what they actually mean to users or how they’re used. Vaibhav wanted to create a hub where complex topics like processors, mobile phone architecture, new gadgets, custom ROMs, new things in technology, artificial intelligence, Linux security tools, and operating system updates could be distilled into clear, actionable information that anyone could understand.
When he’s not analyzing the latest Snapdragon benchmarks or writing guides on Kali Linux, you can often find him testing the latest Android beta builds or optimizing his workstation for peak performance.